How to Fix Loose or Broken Buttons (Before They Fall Off Forever)
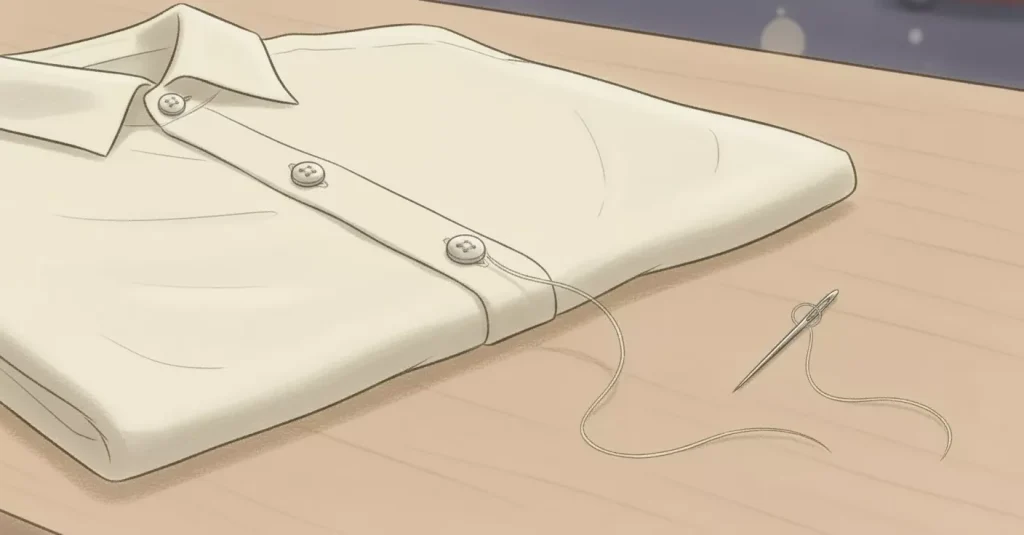
I was rushing to get ready for a meeting once, pulling on my favourite shirt, when I felt that tell-tale wobble. The second button from the top was hanging on by literally one thread. I had about fifteen minutes before I needed to leave, and the thought of changing my entire outfit was unbearable. So I ignored it, told myself it would be fine, and of course it fell off on the tube somewhere between King’s Cross and Holborn. Never saw that button again.
If you’ve got a loose button right now, hanging on by a thread, please learn from my mistake. Fix it today. Not tomorrow, not next week. Today. Because once that button falls off, finding a replacement that matches is surprisingly difficult, and you’ll have that shirt sitting in your wardrobe unworn for months while you tell yourself you’ll sort it out eventually.
Let me show you how to fix loose buttons properly, and how to sew buttons back on so they actually stay put this time.
Why Buttons Come Loose in the First Place
Understanding why buttons fail helps you prevent it happening again. Most buttons don’t just suddenly fall off. They give you warning signs first, and if you catch them early enough, the fix is much simpler.
The most common problem is that the thread holding the button has worn thin. Every time you button and unbutton your shirt, coat, or cardigan, there’s friction on those threads. Over time, especially if the button was sewn on with cheap thread or just a single strand, it wears through. You’ll notice the button starting to wobble before it actually comes off.
Sometimes buttons come loose because they were never sewn on properly in the first place. Fast fashion brands use machines that whip through button attachment at speed, and quality control isn’t always brilliant. The stitching might look fine but there aren’t enough passes through the holes to make it truly secure.
Tight clothes make buttons work harder. If your shirt is pulling slightly when it’s buttoned, that constant tension weakens the thread faster. This is particularly true for buttons at stress points like the middle of a shirt where the fabric pulls most, or the button on suit jacket cuffs that gets caught on things.
Washing and drying also contributes to button loosening. The agitation in the washing machine, the heat in the dryer, it all puts stress on the threads. Buttons bash against the drum, get caught on other clothes, and the thread weakens gradually with each wash.
The Emergency Fix for When You Need Five Minutes

If you’ve just noticed a loose button and you’re about to leave the house, here’s what you can do in under five minutes. This isn’t a permanent solution, but it’ll get you through the day.
Clear nail polish works surprisingly well as a temporary fix. Dab a tiny amount onto the centre of the button where the threads come through. Let it dry for a minute. The polish hardens and reinforces the existing threads, buying you time until you can do a proper repair.
I’ve used this trick countless times when I’ve noticed a wobble as I’m getting dressed. It’s got me through full work days, evenings out, even a wedding once. But remember, this is temporary. The nail polish will eventually crack or wear away. You still need to sew that button properly when you get home.
If the button has already fallen off and you need an immediate solution, a small safety pin on the inside of the garment can hold things closed. It’s not elegant, but it works and nobody will see it. I’ve done this more times than I care to admit.
What You Actually Need to Sew a Button Properly
You don’t need fancy equipment. A basic sewing kit will do, and most people already have one somewhere in a drawer. If you don’t, you can get one from John Lewis or even Boots for a few quid.
You need a needle that’s thin enough to go through the button holes easily but strong enough not to bend. Most sewing needles that come in basic kits are fine. The eye of the needle needs to be big enough to thread easily, because wrestling with thread when you’re already frustrated is the worst.
Thread is where people often go wrong. That cheap thread that came in your emergency kit will work in a pinch, but it’s not ideal for long-term button security. Polyester thread is stronger than cotton and lasts longer. Match the colour to your garment if possible, but if you can’t, go slightly darker rather than lighter. Dark thread is less noticeable than light thread on most fabrics.
You’ll need about two feet of thread. That sounds like loads, but you’re going to double it over, which means you’re actually working with one foot. Having extra is better than running short halfway through and having to start again.
A toothpick or matchstick is helpful but not essential. This creates what’s called a shank, which is a little bit of space between the button and the fabric. More on that in a moment, but trust me, it makes a huge difference to how well the button functions.
The Proper Way to Sew a Button That Actually Stays On
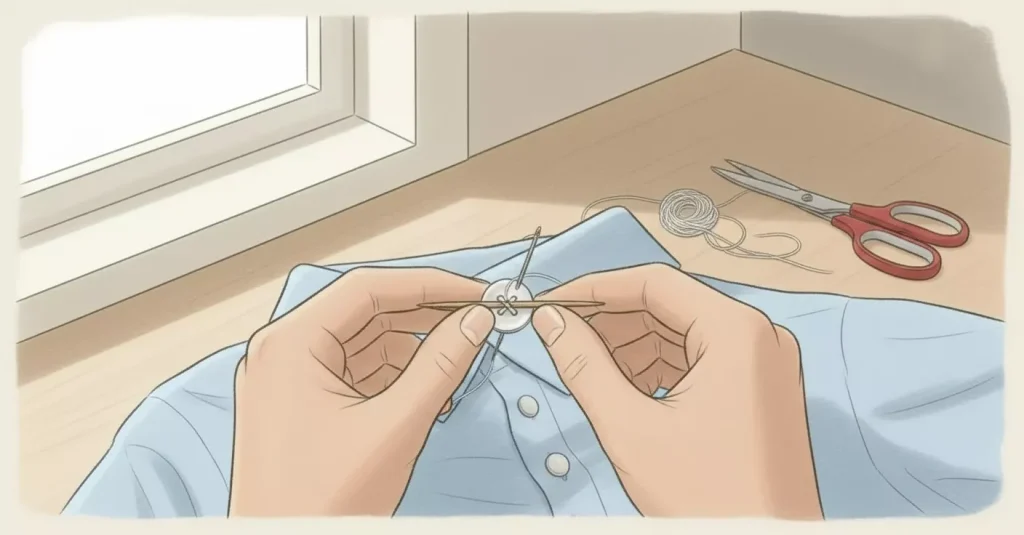
Right, here’s the method that actually works. I learned this from my grandmother after years of sewing buttons on badly, and it’s held every button I’ve attached since.
Cut about two feet of thread. Thread it through the needle and pull it so both ends meet. You’re working with doubled thread now, which is much stronger than a single strand. Tie a knot at the very end where the two tails meet. Make it a good solid knot. I do a couple of loops to make sure it won’t pull through the fabric.
Find where the button needs to go. If it’s come completely off, there will usually be marks on the fabric where the old thread was. Line up your button with the buttonhole on the other side to make sure it’s in the right spot. Nothing worse than sewing it on perfectly only to discover it doesn’t actually align with the hole.
Push your needle up from the wrong side of the fabric, right where the button should sit. Pull the thread all the way through until the knot catches against the back of the fabric. Place your button on top, lining up one hole with where the thread just came through.
Here’s where the toothpick comes in. Lay it across the top of the button, between the holes. This creates space between the button and fabric. When you sew the button on, you’re sewing around this toothpick, which means the button will sit slightly raised from the fabric rather than tight against it.
Why does this matter? Because when you button up your shirt, there’s a layer of fabric from the buttonhole side that needs to fit under the button. If the button is sewn flat against the fabric with no room underneath, it creates tension and makes buttoning difficult. The button will pull and strain against the threads every time you wear it. A shank gives the button room to work properly.
Push your needle down through the opposite hole, all the way through the fabric. Pull it snug but not too tight. Come back up through the first hole. Down through the second hole. Up through the first. You’re creating an X pattern if your button has four holes, or just going back and forth if it has two.
Do this at least six times, maybe eight if you want it really secure. The holes should be well filled with thread. It should look substantial. If it looks skimpy with just a couple of threads showing, keep going.
Creating a Shank and Finishing Properly
After your final pass through the button holes, bring your needle up through the fabric but not through the button. Pull the button up away from the fabric, and remove the toothpick. You should see a little column of threads under the button now, where the toothpick was.
This is where you create the proper shank. Wrap your thread tightly around those threads under the button. Do this five or six times, creating a neat, tight spiral. This reinforces the shank and makes it strong. The button can now move freely without putting strain on the threads going through it.
To finish off, push your needle down through the shank and fabric to the wrong side. Make a small stitch on the back of the fabric, but don’t pull it tight yet. Pass your needle through the loop that creates and pull it tight. Do this twice to create a proper knot. This knot won’t come undone.
Trim the thread close to the knot, but leave a little tail. If you cut it right at the knot, it might unravel. A small tail gives you security. Turn the garment right side out and test the button. It should move freely, and buttoning should be easy without any pulling or tension.
When Buttons Are Actually Broken
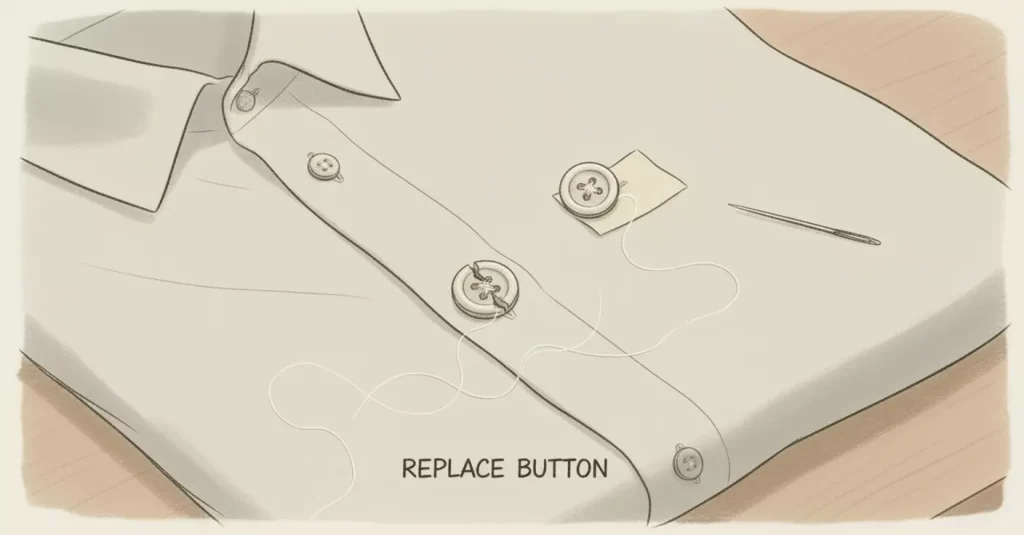
Sometimes the button itself is the problem, not the sewing. Plastic buttons can crack, especially old ones or ones that have been through the dryer too many times. The edges of the holes can split, which means the button won’t hold thread securely anymore.
If a button is cracked or damaged, you need to replace it. There’s no fixing a broken button. Check the inside of your garment first. Many shirts and coats come with a spare button sewn onto the care label or an inside seam. If you’ve still got that spare, brilliant. Use it.
If you’ve lost the spare or never had one, you need to find a replacement. This is surprisingly difficult. Buttons are like snowflakes, no two are exactly alike unless they came from the same batch. You can try haberdashery shops like John Lewis or The Cloth House in London, but finding an exact match is rare.
The alternative is to replace all the buttons with a new set. This sounds extreme, but it’s sometimes easier than trying to match one button. If it’s a shirt with six buttons and one has broken, buying six new matching buttons might be the best solution. It gives you an opportunity to choose something interesting, too. New buttons can completely transform a boring shirt into something special.
The Problem of Coat and Jacket Buttons
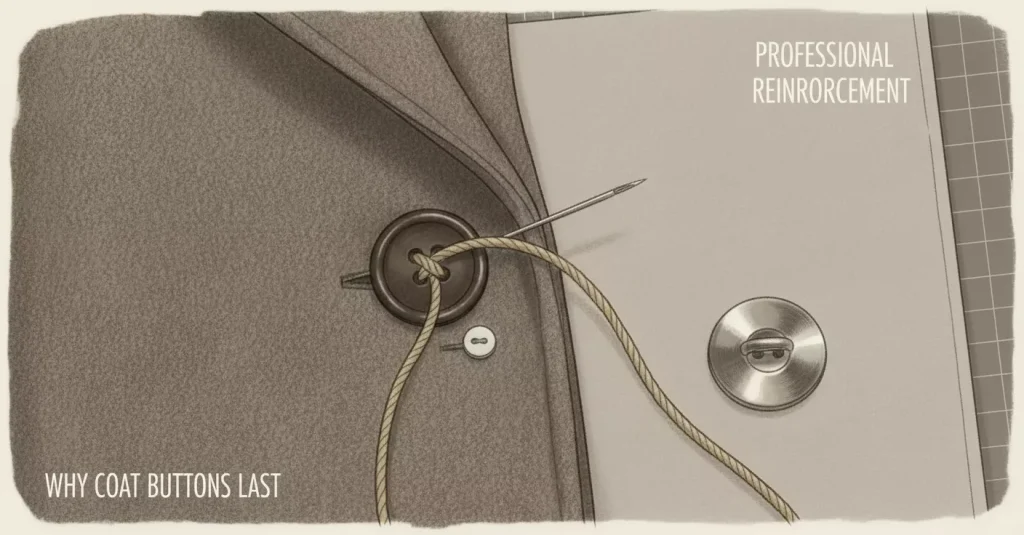
Coat and jacket buttons are a different beast from shirt buttons. They’re usually larger, heavier, and under much more stress. A coat button needs to hold the weight of the fabric and withstand pulling as you put the coat on and take it off.
For heavy-duty buttons on coats, you want to use button thread or even dental floss. Regular sewing thread isn’t strong enough for the job. Button thread is thicker and specifically designed to handle the stress that coat buttons endure.
Some coat buttons have a metal loop on the back instead of holes. These are called shank buttons, and they’re sewn on slightly differently. You thread your needle through the shank and the fabric multiple times, creating a firm attachment. The built-in shank means you don’t need to create one with a toothpick.
If a coat button has come off and you’re sewing it back on, consider reinforcing the back of the fabric with a smaller button. Professional tailors do this. They sew through the coat fabric, the main button on the front, and a small backing button on the inside. This distributes the stress and prevents the button from pulling through the fabric.
Preventing Buttons from Coming Loose Again
Once you’ve gone to the effort of sewing a button on properly, you want it to stay put. Regular maintenance helps. Every few months, check all the buttons on your most-worn clothes. Give them a little tug. If they wobble at all, reinforce them before they become a problem.
When you’re washing clothes with buttons, button them up first. This reduces the stress on the threads during the wash cycle. The buttons aren’t flapping around loose, catching on things, pulling on the threads. It seems like a small thing, but it makes a difference.
Turn items inside out before washing if the buttons are decorative or delicate. This protects them from bashing against the drum and other clothes. It’s particularly important for shirts with mother-of-pearl or vintage buttons that are more fragile than plastic ones.
Air drying is gentler on buttons than tumble drying. The heat and tumbling action in dryers is harsh on buttons and threads. If you must use a dryer, use a low heat setting and take items out while they’re still slightly damp. The less time in the dryer, the better for button longevity.
When You Really Need Expert Help

If you’re anywhere near North Finchley or Notting Hill and you’ve got button repairs piling up, we’d be happy to help at Glint Express. We see loose buttons, missing buttons, and button disasters of all kinds at our North Finchley and Notting Hill branches.
Sometimes you just need someone to sort out the button situation on five different shirts at once. Or you’ve got a coat with a button that’s come off and you don’t have time to deal with it. We get it. Life’s too short to spend your evenings sewing buttons when you don’t want to.
Bring your things in and we’ll take care of it. We’ll do it properly, with strong thread and proper shanks, so you don’t have to worry about those buttons coming loose again anytime soon. It’s what we’re here for, making your life easier and keeping your clothes in good shape so you can actually wear them.
That shirt with the loose button that you keep meaning to fix? Today’s the day. Either spend five minutes sorting it yourself, or drop it off with us and we’ll handle it. Either way, don’t let that button fall off. Trust me on this.